Paint a Watercolor Autumn Maple Leaf - Step-by-Step Tutorial
|
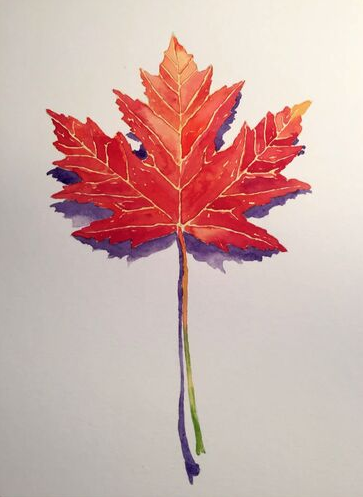
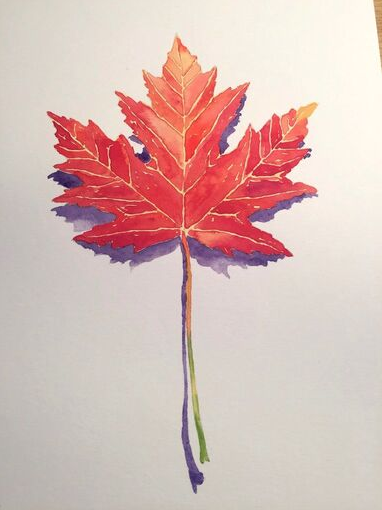
I am so excited to share with you my step-by-step watercolour tutorial showing you exactly how to paint the beautiful Autumn Maple leaf, like you see at left.
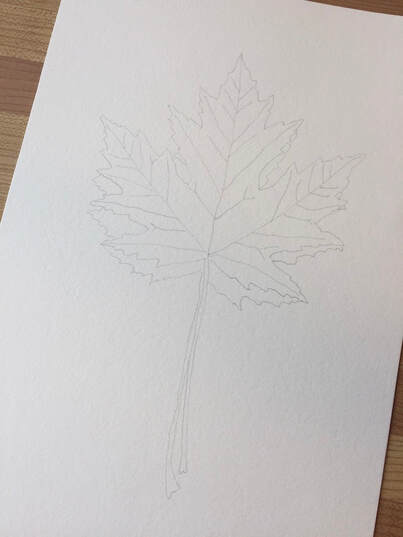
To get started, I've provided the drawing pattern you'll need to use to trace onto your watercolour paper. You can draw a leaf yourself if you prefer, but you don't have to. Click here to access the done-for-you drawing. You will need the password to access the Library, which is free, so you'll need to enter your email address to be sent the password. Check your inbox right away. Step One - Download the drawingOnce you have logged in to the Library, download and print the Maple Leaf drawing.
You will notice that some of the lines represent the outline of the leaf and its veins, while others outline the shadows around the leaf. TIP: The light source for the image is from straight on, which is why you see shadows on both sides of the leaf. As you know, when leaves dry in the fall, they tend to curl so our leaf is not lying flat, and the shadows indicate this to the viewer. |
Step Two - Choose your watercolour paper
The choices in watercolour paper are endless. For this project, I used 140 lb. cold pressed watercolour paper that I purchase by the sheet and cut into smaller pieces. I don't recommend using paper that is lighter in weight, such as 90 lb. as it will warp a lot when wet. Use my link to take a look at the options. If you're just starting out, I recommend getting a watercolor pad in 9" x 12" or 11" x 17" as either will give you room to play.
Step Three - Transfer the drawing to watercolour paper.

Maple Leaf pattern for tracing.
|
Once you have downloaded and printed your drawing, you'll now want to trace it onto watercolour paper.
Why would we not print it directly to watercolour paper? Because inkjet printer ink is water soluble and as soon as you add water, you'd have a mess. Also, the lines on the drawing are much heavier and darker than you'll want on your watercolour paper. The method for transferring the drawing to your watercolour paper is simple. |

Trace drawing onto watercolour paper the low-tech way. Hold it up to a window.
|
Paper clip the image behind the watercolour paper, hold it up to a window—just like you did as a child—and trace the lines.
I recommend using a light pencil, such as a 2H pencil, which has a hard lead so press lightly. You can use a regular HB pencil, just keep the lines light.
I recommend using a light pencil, such as a 2H pencil, which has a hard lead so press lightly. You can use a regular HB pencil, just keep the lines light.
Your drawing on watercolour paper, ready to start painting.
|
Here is my drawing on watercolour paper. Notice that I have also included the lines for the shadows.
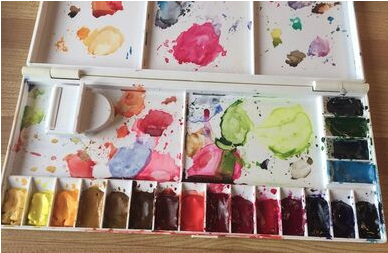
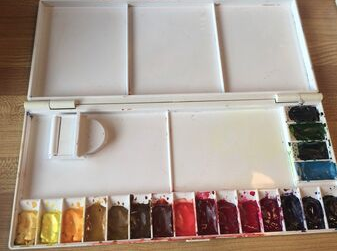
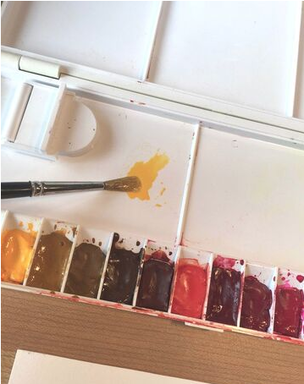
Step Four - Your paletteThis is the palette of watercolours that I used for the maple leaf painting, before I cleaned up the old paint mixes (left). I don't usually clean the palette until I'm ready to create a new painting and have an idea of the colour mixes I will use. In this case, I wiped out all the old mixes with water and paper towel and started fresh (right).
|
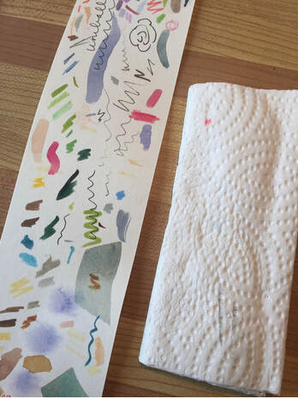
A scrap of watercolour paper for trying your colours, and a folded paper towel for removing excess water.
|
TIP: Keep a scrap of watercolour paper nearby to test your colours prior to using on the artwork itself.
TIP: Have a folded piece of paper towel near your hand for removing excess water from your brushes. Step Five - Lay down background colourOne of the most important distinctions of watercolour painting is that you work light to dark. Because the medium is nearly transparent, using lighter colours over darker ones doesn't work.
|
Use the space provided to mix your colours with water. Or a ceramic plate will do.
|
Your first step is to paint the entire leaf with a medium yellow colour with a fair amount of water in the mix. I used Cadmium Yellow Dark, but you can choose a different yellow if you prefer. Paint the entire leaf surface but not the shadow areas. You can paint right over the pencil lines.
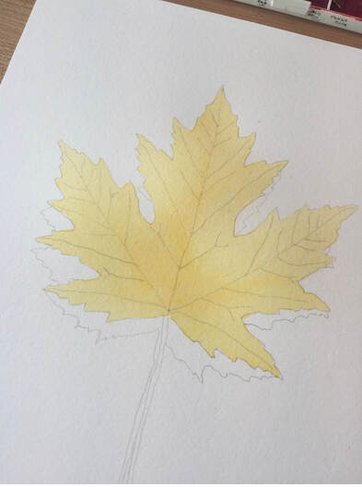
Background colour on maple leaf is medium to pale yellow.
|
IMPORTANT: Wait for this layer to dry completely before proceeding. Once it is dry to the touch, you can proceed to add your other colours.
Mix some red paint from your palette. I used a mix of Cadmium Red Light and Alizarin Crimson, but you can use whatever you have. 
Mix different shades of red as you like.
|
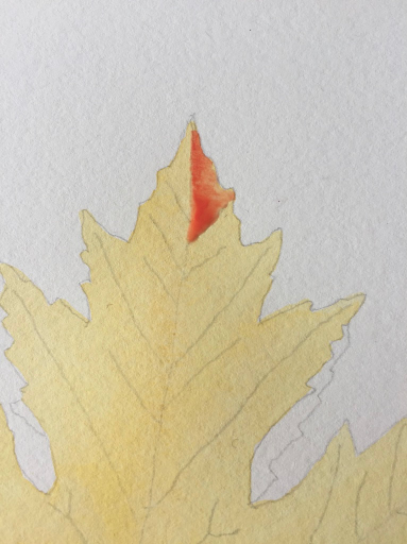
Start at the top using your red paint mix.
|
Step Six - Add your foreground colours
This part takes a steady hand, so if you think you might quiver a little lay another piece of paper on top you your watercolour paper so oils in you skin don't transfer to the artwork. You can rest your hand on the paper as needed.
Using a Size 4 watercolour brush, pick up some of your red paint and with the tip of the brush apply it to the right of the centre pencil line and down to the first vein on the right, painting right up to the vein line. Our goal is to obscure the pencil lines but still allow the background yellow to define the veins.

Paint up to the vein lines on two sides, but leave a narrow strip of yellow showing when starting the next red area.
|
Leaving a narrow strip of yellow showing, paint the next space up to and including the next vein line.
As you can see, I've varied the intensity and the tones of the reds I'm using to create a more natural variation of fall colours over the surface of the leaf. Remember to start each new section leaving a strip of yellow showing. Essentially, you are using the pencil lines as guides but only painting up to the lines themselves on two sides. As you can see, I allowed tiny areas of yellow to show through in the patches of red to create a more natural look. |
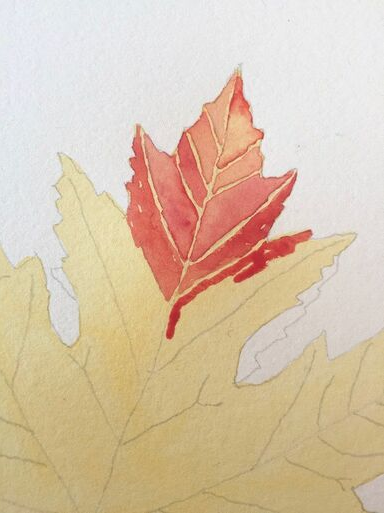
Feel free to let some of the yellow background show through the red by leaving patches with no red.
|
|
Larger, un-veined areas benefit from variation in paint intensity. This is achieved by starting the patch with one shade, then switching to another, allowing the two colours to mix on the paper.
It can also be achieved by adding or reducing the amount of water in your paint mix, as more water means more transparency, while less water gives higher intensity with more pigment. When working on smaller paintings, it helps to turn the paper as you work so it's easier to reach awkward areas. |
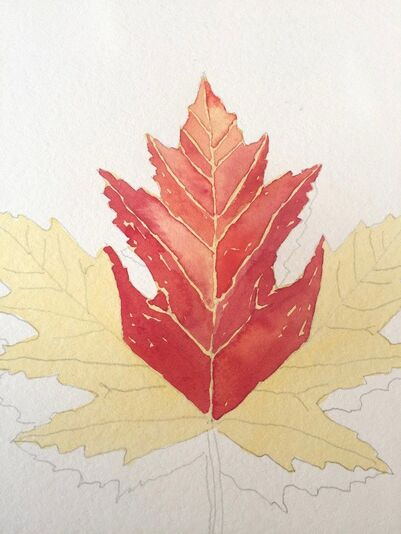
Vary colour or intensity in larger areas.
|
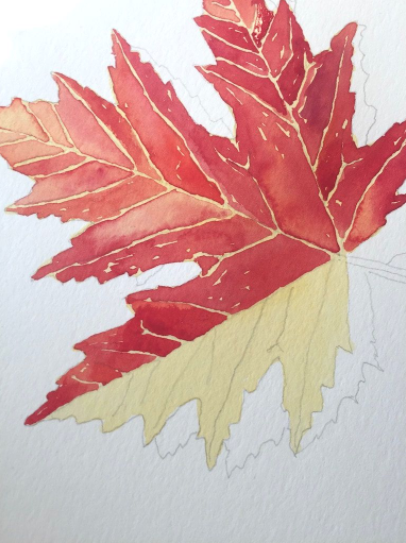
Turn your paper as needed to reach difficult area. Remember not to rest your hand on the paper itself.
|
Notice how the variation in colours and intensity adds interest to the painting. When you've finished the entire leaf, go ahead and paint the stem. I added a little Sap Green next to the yellow on this step (not the red, as that would make a muddy brown). Swish the paint out of your brush with water between loading the next colours, but allow the two to run together.
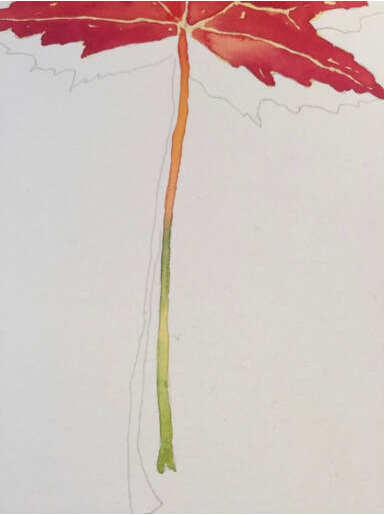
Paint the stem, varying the colours.
|
Step Seven - Paint the shadowsOnce your paper is completely dry and you've finished your tea/coffee/nap, it is time to add the shadows to the leaf. If you try to add the shadow before the leaf is dry the colour may run together and you may not like the result. Strictly speaking, you could paint it without the shadows, but adding shadow makes a painting come alive. I used Ultramarine Violet almost exclusively for the shadows, with only |
Add the shadows in purple, making them slightly more intense next to the leaf.
|
a touch of Paine's Grey along the bottom edges of the leaf for intensity. Using a light hand, paint in the shadows, being careful to run your brush along the edges of the leaf but not into the red. When you're satisfied, allow the paint to dry.
If for some reason you don't feel satisfied, allow it to dry, then stand it somewhere in your home where you can stand back and study it. Make sure there is good lighting. I always stand my finished paintings on my piano for a day or two so I can see if there is anything else it needs. If you want to touch any areas up, do so after you've had a chance to study the painting. Or try painting it again.
IMPORTANT: Resist the urge to keep messing with it. The beauty of watercolour is in its spontaneity and the more you fuss with your work, generally the worse it looks.
Happy painting! I would love to see your finished work, so please share your painting on my Facebook page.

|